What is ShipBob?
ShipBob is a leading third-party logistics (3PL) provider and warehouse management system that offers fulfillment services for e-commerce businesses. With a network of fulfillment centers across North America, ShipBob provides inventory management, order fulfillment, and shipping solutions for growing brands. Primary Purpose: ShipBob delivers end-to-end fulfillment services, allowing brands to store inventory in strategically located warehouses and ship products quickly to customers. The integration with Redo ensures seamless return processing while keeping ShipBob as your source of truth for fulfillment and inventory management.What Does the Integration Do?
Integrating ShipBob with Redo allows ShipBob to remain your source of truth for fulfillment and inventory management. When a return is created through the Redo customer portal, an RMA (Return Merchandise Authorization) will be automatically created within ShipBob via the ShipBob API (version2026-01), notifying the warehouse that items are being returned.
Once the item is received, inspected, and confirmed eligible for return, you’ll approve the RMA within ShipBob. When that happens, ShipBob will communicate with Redo to process the return and issue any store credit/refund or create an exchange order.
How to Set It Up
Follow these steps to configure the ShipBob integration with Redo.Prerequisites
Before you begin, ensure you have:Active ShipBob Account
Active ShipBob Account
You must have an active account with ShipBob as your fulfillment provider.
Products and Orders Synced to ShipBob
Products and Orders Synced to ShipBob
Your products and orders must already be synced to ShipBob, typically through your e-commerce platform. Returns cannot be created for products or orders that don’t exist in ShipBob.
Administrative Access to Redo
Administrative Access to Redo
You need administrative access to your Redo merchant dashboard to configure integrations.
ShipBob Login Credentials
ShipBob Login Credentials
Have your ShipBob account login credentials ready for the OAuth authentication process.
Configuration Steps
Navigate to Integrations
- Log in to your Redo merchant dashboard
- Go to Settings > Returns & Claims > Integrations
-
Locate the ShipBob panel in the list of available integrations
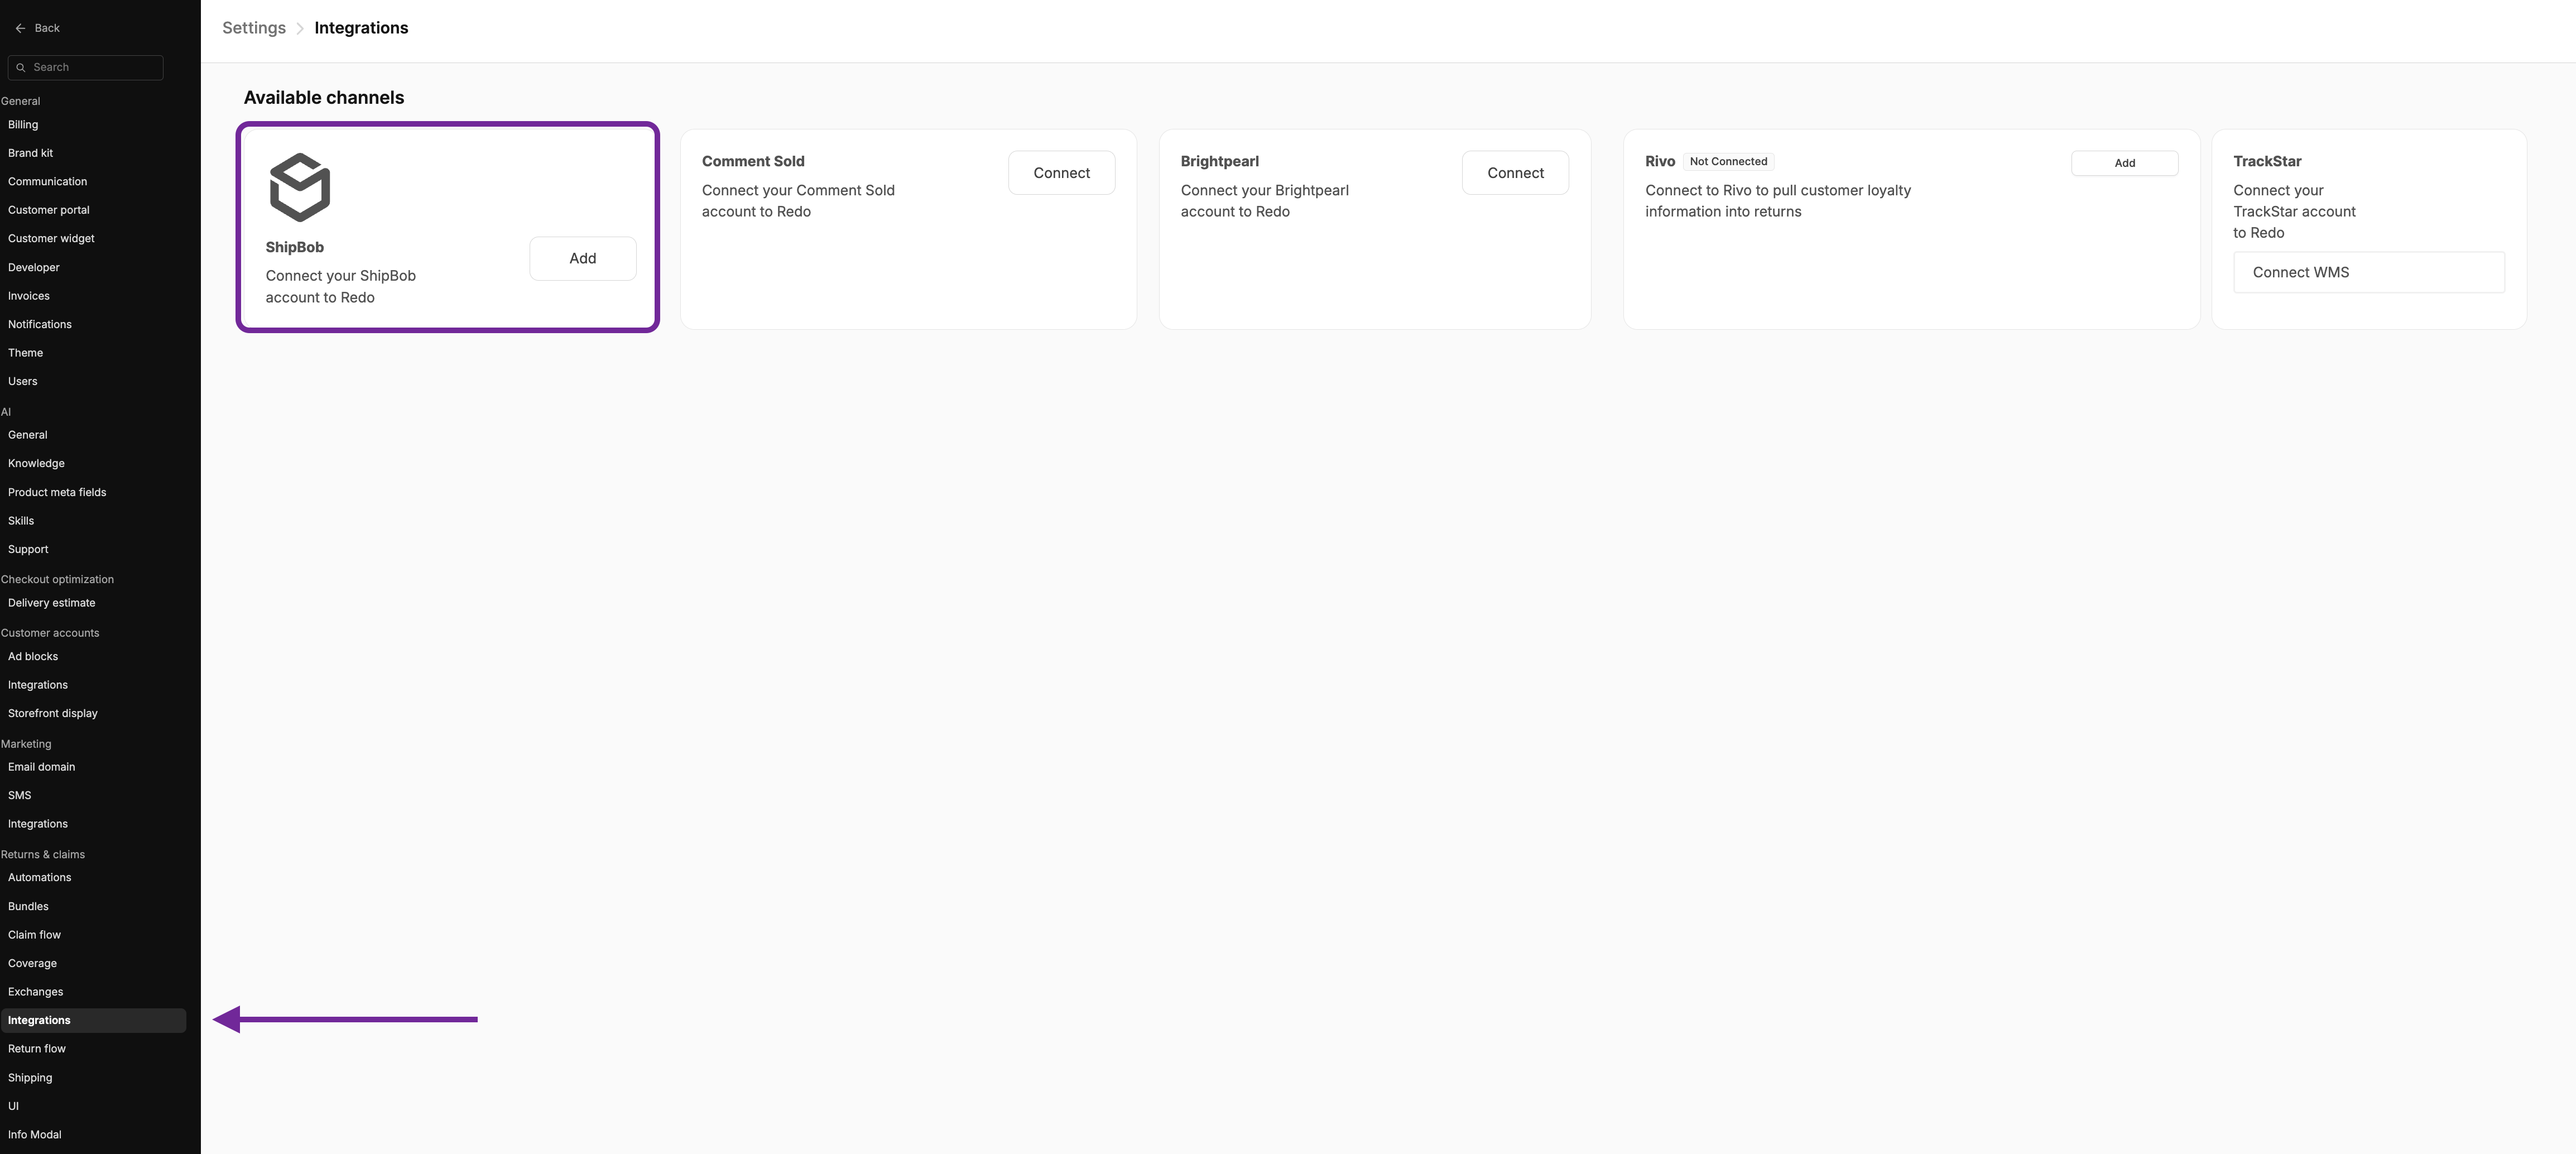
Initiate Connection
- Click the Add button on the ShipBob panel
-
You’ll be directed to a connection page to link Redo to your ShipBob account

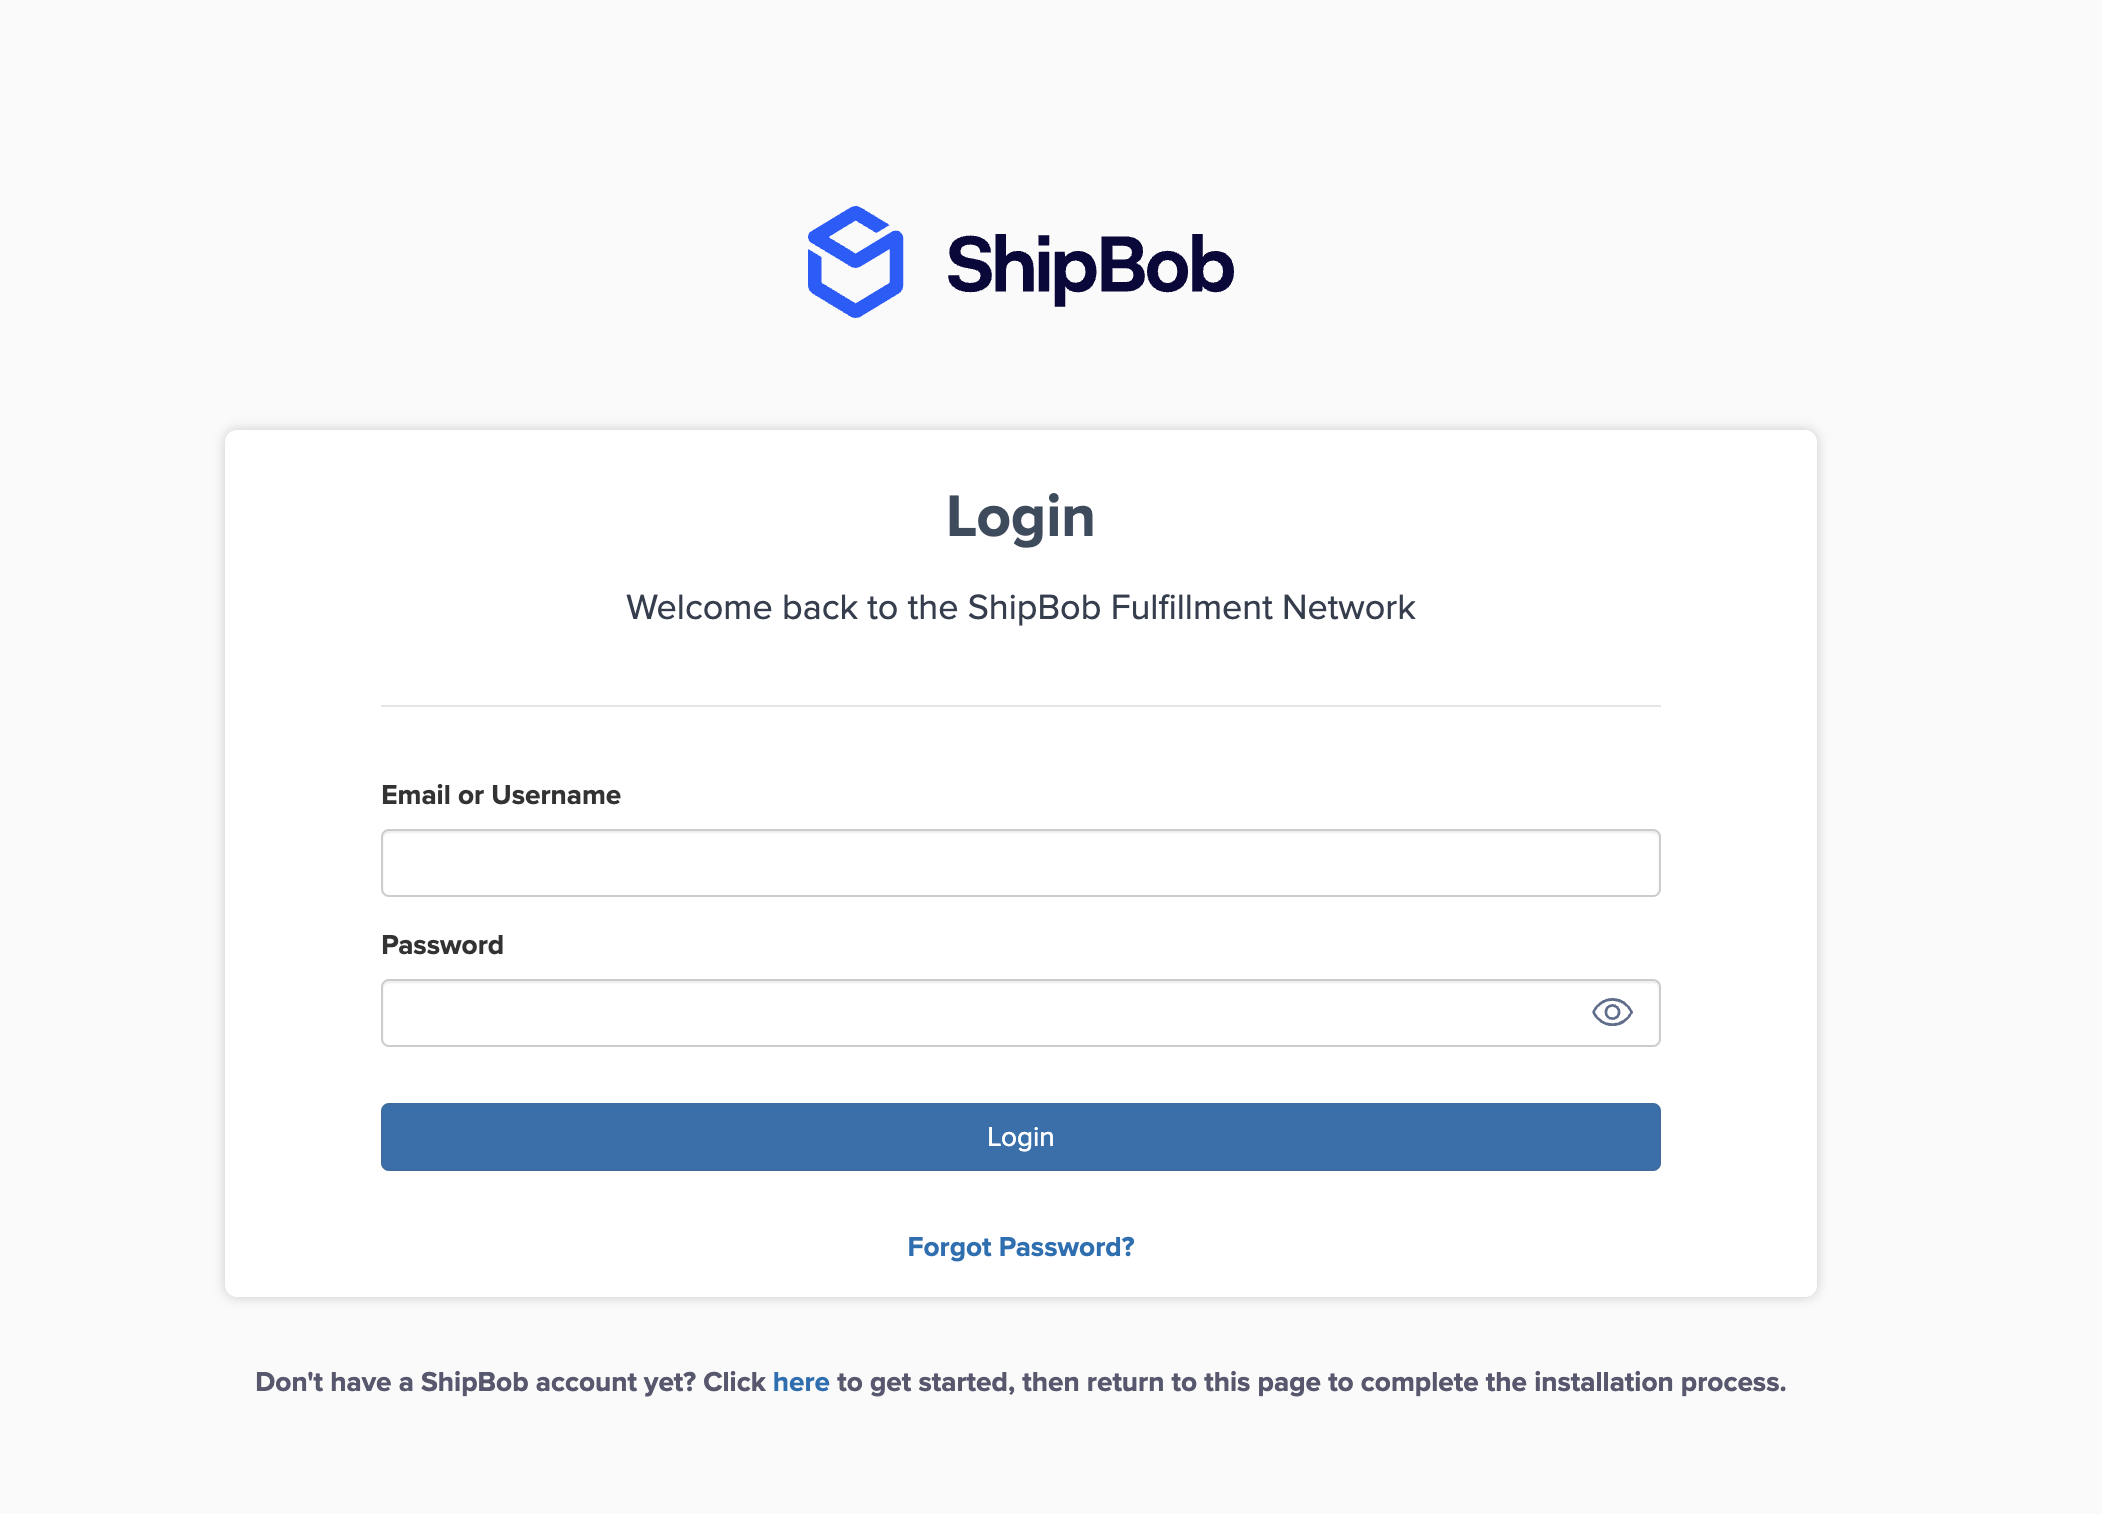
Authenticate with ShipBob
- Click the Connect button
- You’ll be redirected to ShipBob’s login page
- Log in to your ShipBob account
-
Follow the authentication process within ShipBob to authorize Redo
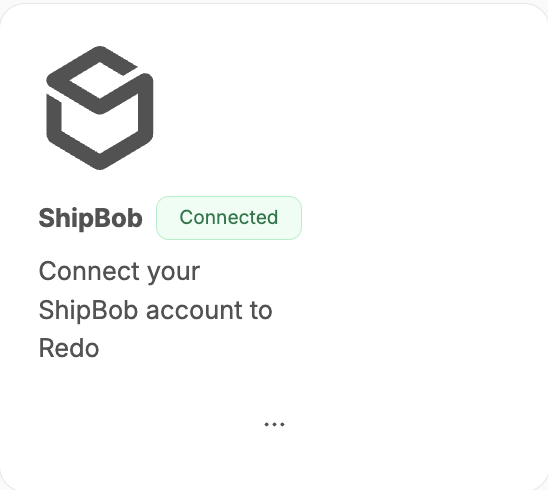
Verify Connection
- After completing authentication, you’ll be redirected back to the Redo merchant dashboard
-
The ShipBob integration panel should now display Connected
How Long Does It Take?
Setup Timeline
| Step | Time | Description |
|---|---|---|
| Initial Connection | 2-3 minutes | OAuth authentication with ShipBob |
| First Return Test | 5-10 minutes | Create test return and verify RMA in ShipBob |
| Total Setup | 10-15 minutes | Complete setup for most merchants |
Operational Timing
Return Status Updates
Manual approval required - warehouse staff must approve the RMA in ShipBob after receiving and inspecting returned items.
Return Processing
Automatic - once RMA is approved in ShipBob, Redo automatically processes the refund/store credit or creates an exchange order.